Mind the crack; 1972 Kenner Blythe fixed!
Written on February 10, 2012 at 12:00 pm by MichelleFiled under: Article with tags: kenner blythe, restoration tips
Hello, hello! It’s been a while since I really blogged about Emmalynn, the lovely 1972 Kenner Blythe that I got back in late 2011. She hasn’t gotten a whole lot of photo time because she spent quite a bit of time in pieces (I’m a bad doll owner, I know). To recap (for those who didn’t read the original posts), here is the laundry list of things that I did in my quest to restore my vintage beauty to her original glory:
- Removed her scalp and hard cap; loose hair plugs were secured (with thread) and scalp tears were reinforced
- Multiple baths for her (a spa wouldn’t be complete without getting rid of the musty smell of old plastic)
- Partline rethatched (!)
- Multiple hair treatments with fabric softener, hot water and foam rollers
- Opening of head to clean out some grime and her eyeballs
- Gluing her pelvic seam crack
- Reinserting her poor legs back in (finally!)
- Replacing her scalp onto her head
The last three points were my latest in fixing up my lovely girl. I actually managed to do it with the Loctite Superglue for All Plastics that I featured earlier this year as one of the Treasures for Dollars articles (item #10). With some tips from Kate/moofers, I managed to fix her!
As always, my disclaimer: I am not a “professional” when it comes to restoring toys, so if you’re not comfortable with fixing your own Kenner, you should really seek out someone who knows what they’re doing. So I am not responsible if you try this out on your own butt-cracked-doll and you damage her even more.
The thing to remember is that not all pelvic cracks are the same. Some aren’t straight, some have many cracks. This method worked for me (and Emmalynn had a straight crack across the molding seam of the pelvis piece – probably the easiest crack to occur because it’s across a structurally weak point in the plastic). The materials that I used were super thick rubber bands, a desk lamp clamp, an emery board, the Loctite Superglue for All Plastics, a towel and the broken pelvis piece.
- You need to sand the edges that you want to meet again. I used an emery board because it was handy and thin. You can use sandpaper if you want and have it available.
- Get the applicator tip into the crack. I needed the crack a little wider than it was without the legs in, so I popped the legs in and ran the applicator around the seam edges.
- Follow the directions on the packaging – you need to leave the applicator alone for 60 seconds.
- Have the clamp ready. I used a desk lamp clamp on my boyfriend’s suggestion (he’s super handy to have around) and placed the pelvis piece into the clamp and had it cushioned by the thick rubber bands.
- Apply the glue and quickly clamp it so that the edges are meeting. Wait until the glue has cured (I waited a few hours).
- Sand down whatever glue got squished out (again, emery board or sand paper until smooth!).
- Lay a towel out onto the table. Heat up the plastic of the pelvis with hot water (I ran it under hot tap water). Do this for a while.
- Press the leg ‘joint’ plastic into the hole (make sure it’s the correct leg on the correct side!).
- Run pelvis under hot water again after successfully getting one leg in and pop the other one in. I used the towel to keep the counter dry while I was shoving the legs back into the pelvis
- Rejoice! Your Kenner has legs again!
Unfortunately, I didn’t get any photos of the actual process, mostly because I was all “OMG, one leg in, quick, need to get the other one in!!” and was working in such a rush. If you need more explanation over any of the steps, let me know.
One of the issues that I ran into when I was reassembling Emmalynn was the fact that after I had put the hard cap back into the scalp, it was unable to clip back onto the head. I think part of the reason is why it was so easy to come off to begin with (I did not have to manipulate it at all, the hard cap came off with the scalp). After careful deliberation with myself, I decided to put the scalp back on without her hard cap.
The only use of the hard cap is to keep the scalp on her head. Well, Emmalynn is a forever girl and if I ever do decide to sell her, I can sell her with her hard cap just not attached. I asked the opinion of Yuki/killertomato and she recommended putting the scalp back on by gluing it down. The pros to this idea is that there would be no or less of a scalp gap and, with the use of water soluble glue, it was reversible if I ever needed to open her up again. The cons is that I’d be leaving the hard cap out. On the other hand, anyone who reroots a Kenner scalp with mohair or some other thick fiber knows that they can’t fit the hard cap in properly. Also giving a Kenner another Blythe scalp or a Cool Cat scalp requires gluing down as well (there’s no “lip” for the hard cap to stay in. So gluing it was! Also, the thing with using (water soluble!) glue is that if I decide to later put the hard cap back in (or at least try again), it shouldn’t be that difficult to remove the scalp and without the use of the hard cap, I wouldn’t be stretching the scalp again when removing it.
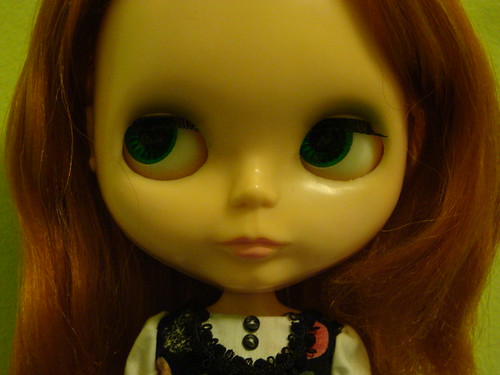
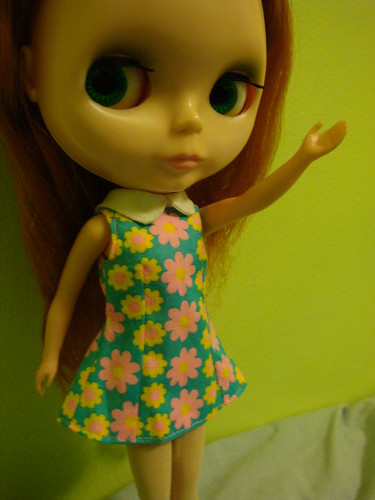
There’s a lot to be said about vintage Blythes. The plastic feels different, their bodies just feel lighter. They smell different, the hair feels different. And those pretty vintage eyes looking at you? That’s pretty wonderful too. I’m pleased to introduce all of you to the newly restored, but always classy, Emmalynn.
Emmalynn and I would like to thank everyone so much for words of encouragement, tips or just comments during this restoration process. I lucked out with her because she didn’t have a lot of severe issues – but everything was a learning curve and I learned a lot while working on her.


 BlytheLife.com opened in July 2010 and is a blog and resource hub for all things Blythe!


She looks amazing, Michelle!
Job well done, ladies!
Yay well done! She’s looking MARVELLOUS <3
Hi! I have a 1972 Redheaded Blythe doll. She is in marvelous shape, with a couple of things I’d like to repair. One is her neck. It”s broken! My father had glued it on way back when. I’ve removed about 95% of the glue (ugh), but this still leaves a problem. How do I re-crack it and not break anything more than the neck, and then restore it back to its’ original position/moveable head. And the other is a few nicks on her cheek. I’ve been reading your tutorials, and I will try the sandpaper/model scratch cream. But what and how do I repair her neck.Please, I’m in need of some serious help here!!!!! Thanks bunches…….Dusty
You’ll want to use very fine sandpaper/sanding sponges.
As for the neck, without photos it’s very hard for anyone to provide advice. It’d also depend on what kind of glue was originally used (e.g. super glue vs. some other kind of glue).
I’d recommend making an account on the Blythe Kingdom forum and posting photos there to see if there’s anyone can help. It’s hard for anyone to make good recommendations without looking at the doll first.