


 BlytheLife.com opened in July 2010 and is a blog and resource hub for all things Blythe!


Sew With Me – Part 2
Written on August 9, 2010 at 12:00 pm by Guest AuthorFiled under: Article with tags: mama lisa, sewing
This is a guest post by Mama Lisa. If you’re interested in contributing and writing for BlytheLife.com, click here for more information.
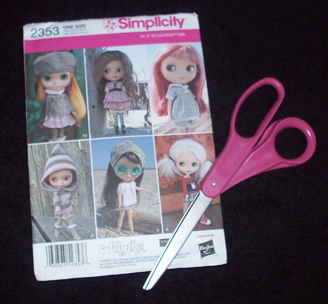
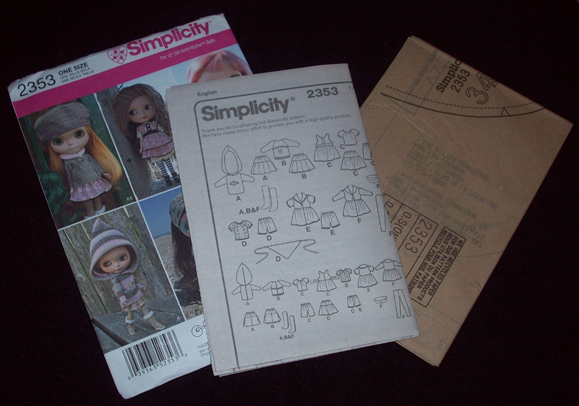
You just bought the very first Simplicity sewing pattern for Blythe. Now what?! Don’t panic! It isn’t as hard as you think it will be. Get a great pair of scissors and follow along as you learn all about sewing with patterns.
Take a good long look at your pattern. The more you understand your pattern, the easier your sewing experience will be.
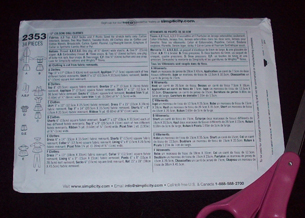
On the back of the pattern, you will find specific information on what is needed to complete each view. Note that on the very bottom of the pattern there is a website, email address and a toll free phone number for you to call if you have any questions. These are all great resources for any questions you may have while sewing.
Unfold the Instruction Guide and read the entire pattern before even cutting out the paper pattern pieces. Getting to know your pattern is very important. Once you have read it all and looked over the pictures, you will be less intimidated by what you will be cutting out. Get a pen and a highlighter to circle things you want to remember and write notes to help you. Get to you know your pattern!

The Instruction page will have a lot of information that will be helpful – note that all of the views available will be drawn in a simple line sketch. This makes it easy to see if the view you choose has a lot of sewing details like pleats or darts. There will also be a drawing of each numbered pattern piece and listed below will be what each piece is.
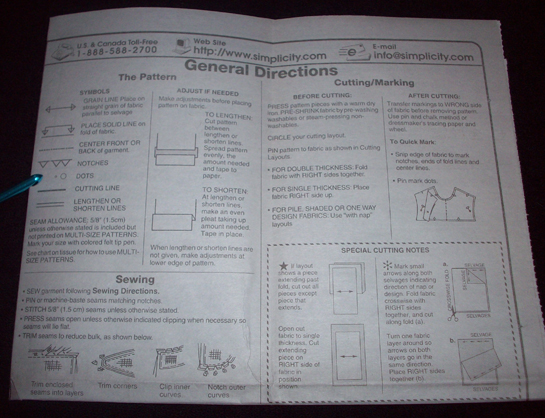
Next will be a very important part of the Instruction guide, it is called General Directions. It will tell you what each symbol on the patterns mean. In addition, it will tell you how to clip curves or do special steps needed in the patterns – always read this part of your pattern.
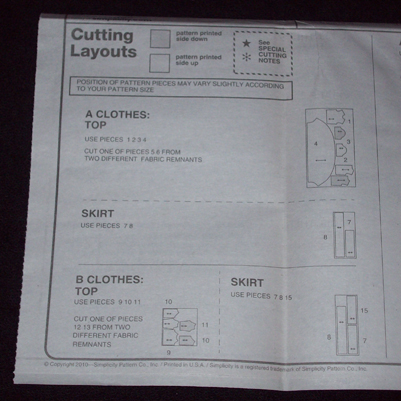
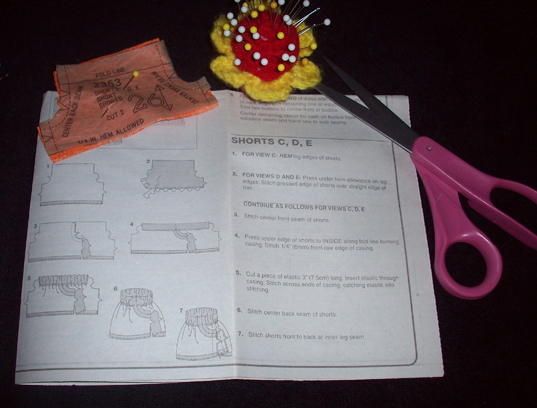
Now find the area of the Instruction Guide that is called Cutting Layouts. In this area, each view of the pattern is shown in the correct way to lay the pattern on the material you have chosen. Generally, this is the most efficient way to not waste any material as you cut out your chosen pattern. For this article, we will be using the shorts pattern as an example
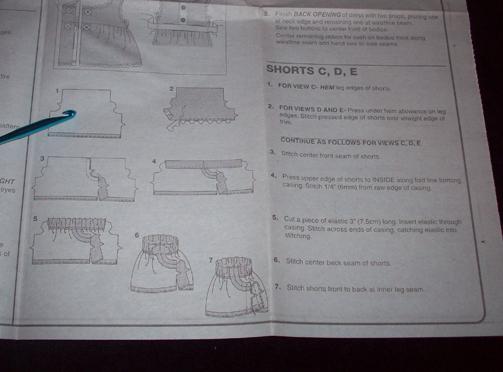
Each view will have a separate area of the Instruction Guide. Locate the area that talks about the shorts. As you can see, C, D and E are shown together. The sketches are paired with the written instructions. Make sure you have these instructions open and close to the sewing machine to be able to look at them and follow while you are sewing. Don’t try to do things by memory!

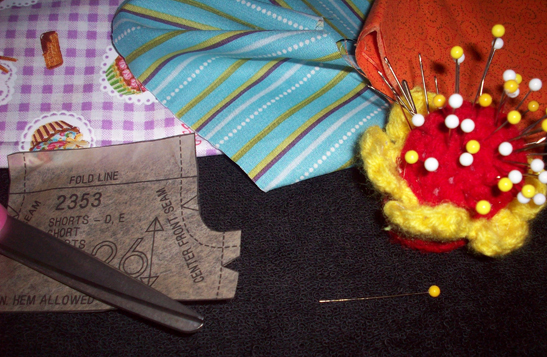
Now unfold the tissue paper where the pattern pieces are printed. Be careful because the tissue paper is very thin and will tear easily. Locate the pattern numbers of the view you want to sew. Roughly cut them out from the tissue paper, being careful not to cut the other pattern pieces. Set them aside and neatly refold the pattern tissue.
Use a zipped bag to store your pattern and Instruction Guide. Put the pattern envelop on top so you know which pattern is in which bag – this makes it very easy to store and to use your patterns again in the future.
Carefully cut along the cutting lines as shown on the tissue pattern. Be very careful cute very accurate. If your pattern piece is cut incorrectly, it effects how you will cut the fabric. Be careful! Details count when you are sewing for dolls.
Now you’re ready to cut your fabric!
Gather the fabric you want to use. It can be a brand new piece of fabric or scraps from other sewing projects. You will need very sharp pins – I like to use quilt pins because they are very sharp, thinner than normal pins and longer. You will also need a niece piece of cardboard, such as the top of a sturdy box. It needs to be at least ¼” deep and large enough to spread out your materials and pattern.
Find the Cutting Directions part of the Instruction Guide where your pattern is listed. Follow the instructions for laying out the tissue paper on the fabric. (Note: Here I just folded the fabric so I only had to cut it out once.)
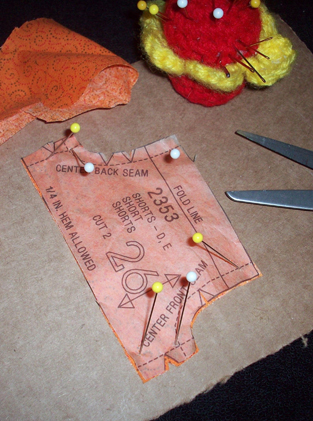
Instead of trying to slip the pins through the fabric and the pattern, just ‘jab’ the pins through the tissue paper and fabric and into the cardboard. You must be careful not to move the tissue while you are pushing in the pins. Note the angle of the pins are to the inside of the pattern. This way, they will not be in the way of your scissors when you cut. You want to make sure that you follow the Cutting Directions exactly – be sure to make the fabric pieces the correct size. Details count!
Unpin your pattern from the cardboard and use one pin to attach the tissue paper to the fabric pices. Find the area of the Instruction Guide that has sewing steps for what you are making. You are now ready to begin sewing your new Blythe garment!
The next lesson will be setting up your sewing machine and general sewing instructions.
I look forward to the next time when you Sew With Me!
About the Author: Mama Lisa started sewing over 40 years ago. After discovering Blythe, her natural love for sewing came in handy making clothes her dolls. Several collectors encouraged her to sell the doll garments she made and Darling Dolly was born. The articles in this column are from her forthcoming book entitled “Sew With Me.” Enjoy your sneak preview! You can check out Mama Lisa’s work at Darling Dolly and Mama Lisa Designs.
Yay! thanks for the instructions! Great article!
Thank you, I LOVE these articles. Can’t wait for more!
Thank y’all for all the kind words!
Can’t wait to see what is created….