Written on November 30, 2016 at 12:00 pm by Michelle
Filed under: Article with tags: blythe on a budget
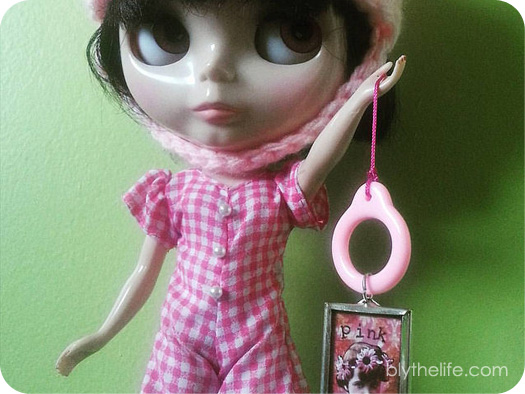 Cute pink gingham romper? Totally thrifted!
I love going to thrift stores and trying to uncover hidden jewels in the bags of discarded toys. I tend to avoid any and all Barbie dolls and most Barbie clothes. Skipper is often something that I look for, because I love vintage Skipper outfits. Sadly, with more and more people who understand how to use eBay (or craigslist), it does get harder to find good vintage Skipper pieces at the local thrift store. Here are a few of my tips for finding some great hidden thrift store gems:
- Go through the bag of clothes or shoes. You never know what you’re going to find. If it’s all obviously Barbie-sized or baby doll sized clothing, you can probably set it aside. But I’ve found little treasures like squishy Barbie boots (!) and roller blades in a bag before, and the squishy Barbie boots alone were more than worth the price of the bag of other junk. I did find some other treasures inside though, so it wasn’t a total bust.
- Consider the Barbie furniture, houses, and cars. Even if you’re not completely into the all-over-pink style, plastic can be painted. There are some fantastic spray paint designed for use on plastic these days, so ignore the colour of the furniture (or house, or car) and think about the overall shape. Do you love it? Do you wish it was brown/yellow/blue/green/white instead? Do you have the patience to put painters tape on the areas you don’t want to paint and to go out and buy some spray paint? If you answered yes to all those questions, and the piece is a good deal, that makes it a hidden gem! You just need to put some time and effort into transforming it.
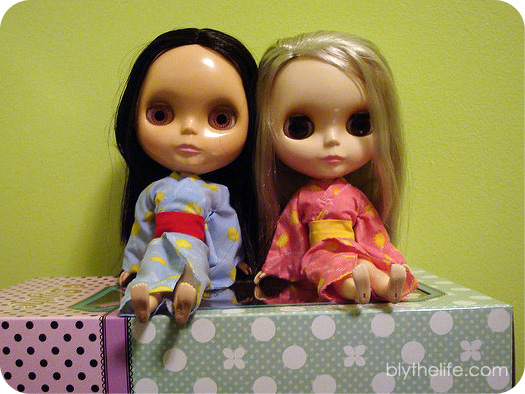
- Never pass up the opportunity to dig through a pile of dolls. I still keep my fingers and toes crossed that one day I’ll come across a lonely, slightly ratty Kenner Blythe at the bottom of a pile of porcelain and vintage pose dolls.
- And with the last one… If you like Petites (LPS) or Licca (bodies), go through the bags of dolls hanging on the walls. After all, the original Hasbro Petites were released in North America and they occasionally make their way to the thrift stores after a toy bin cleaning, and I’ve heard many stories of people finding Licca dolls in the stores that got discarded like their Barbie cohorts.
What are some of your tips for finding thrift store gems? Share below!
Written on November 25, 2016 at 12:00 pm by Michelle
Filed under: Article with tags: holiday shopping guide
Welcome to the 2016 Blythe Holiday Shopping Guide! This is part 1 of a 3 part mini-series to help those who are trying to figure out what to buy for themselves, or what to buy for the Blythe-lover in their life. Part 1 is the $25 and under shopping guide!
I changed it up this year by asking BlytheLife readers to join in the Shopping Guide! There’s still room in parts 2 and 3 of the Holiday Shopping Guide (feel free to scroll down for a bit more information).
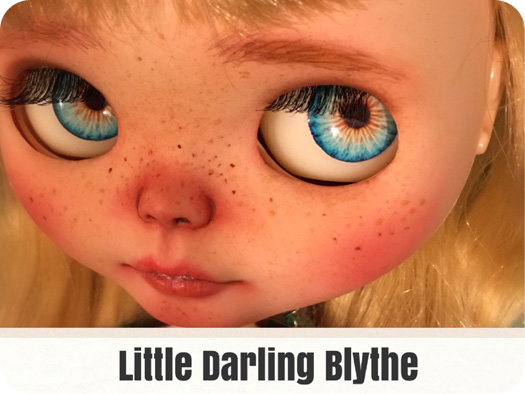 Do you wish your dolls didn’t have the stock pink or orange eye chips anymore? Little Darling Blythe is an Etsy shop based out of the USA that sells hand casted resin eye chips for Blythe! Cute and affordable, at $6.50 USD a pair! If you’ve never changed out eyechips before, I can tell you that it’s super easy because I’m able to do it (and here’s a tutorial!). Little Darling Blythe is offering up 15% for your total purchase with the coupon code Ldb15.
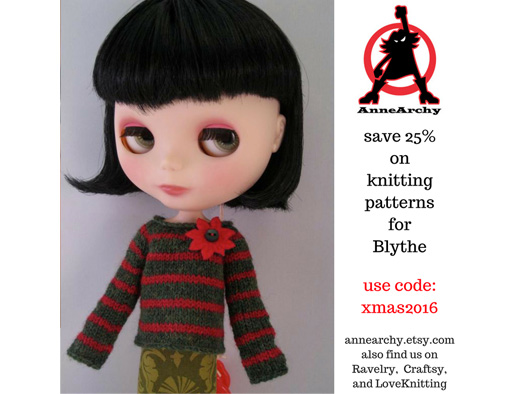
Are you a knitter? Have you always wanted to knit a little something for your Blythe dolls but weren’t sure how to begin? AnneArchy has knitting patterns for you (or the knitter in your life, if you want to outsource the knitting aspect of it!). Her patterns span all three sizes: Petite, Middie, and Blythe! You can save 25% off your purchase with the coupon code xmas2016.
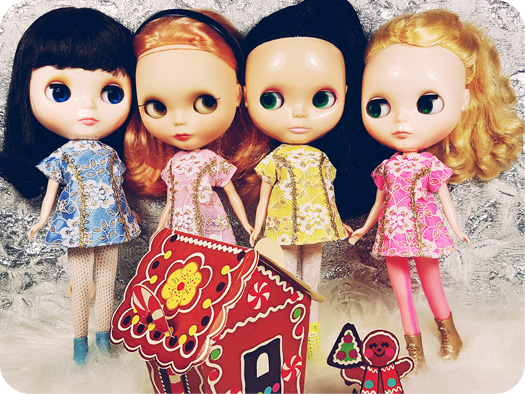
Do your dolls need a new holiday party dress? Endangered Sissy will have them covered! The new Fancy Schmancy collection is up right now, and with the coupon code BF2016 you can save 35% off anything that’s in-stock (coupon code can’t be used for holds or custom orders). It’s Endangered Sissy’s biggest sale of the year and the coupon code is good from now until 10pm MST, November 28th 2016.
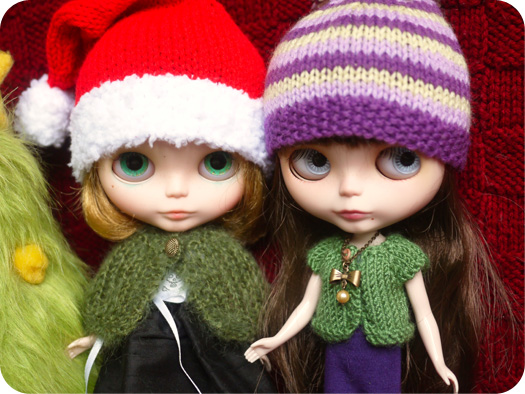
To finish off decking your dolls out from head to toe is Blythe Couture! Blythe Couture has cute dresses, darling separates, shiny baubles, and more! With the coupon code BlytheLifeCheer15, you can get 15% off your purchase at Blythe Couture from now until December 31st, 2016.
Part 2 of the 2016 Blythe Holiday Shopping Guide will feature gift suggestions that are $25-50, while Part 3 will be $50 and up. If you’re an online shop owner and would like to be featured, please email me for more information at michelle@blythelife.com.
Written on November 16, 2016 at 12:00 pm by Michelle
Filed under: Article
Since the addition of fakes in the Blythe market, I’ve been asked time and time again why I “bother” with buying legitimate Blythe dolls. Here are some of the arguments that I often get presented with that are pro-fakes:
- They are less expensive/more affordable. This is true – a decent fake can be had for as low as ~$40-50 USD while a legitimate Blythe doll may be as low as ~$100-125 USD.
- There is a wider variety in hair colours and colour combinations in fakes than legitimate Blythe dolls. Also true – rainbow scalps had become quite popular since they started to pop up!
- Most people don’t use stock clothing anyways, so why not buy a nude fake? Sometimes I feel that this is a poor argument, because I can be quite fond of a lot of stock clothing. I may be one of those rare collectors that will actually reuse the stock clothing and have my dolls dressed in them over and over again. I am a huge fan of separates and find that quite a bit of the stock clothes are good quality. (Stock underpants do not qualify.)
I started collecting Blythe in 2009. Back then there were no known fakes on the market. Fakes didn’t really start rearing their ugly heads in the community until early 2011. The problems that I had with the fakes is that they were made to look like legitimate Blythe dolls – down to the stock clothing and boxes. It’s a recipe for disaster, as I feel that I would be very disappointed if I had bought a doll thinking that it was legitimate (due to the fact that it came in a proper box and the clothing looked right) and would feel incredibly ripped off. The majority of my dolls have been NRFB when they arrived, I am a bit spoiled that way because I really enjoy the act of unboxing a Blythe doll. There’s something really exciting about taking out all the new bits and bobs of stock, to brush a doll’s hair for the first time, to set her up on a stand. I’ve bought a secondhand Blythe before, but it isn’t as exciting and I don’t get the same sense of anticipation when unboxing a secondhand doll as I do a NRFB doll.
For me, I am acutely aware that Blythe is an expensive hobby. I started collecting Blythe while I was in post-secondary and have continued with it despite having pressing necessities like tuition and textbooks. Now that I have a Real Grown-Up Job, I haven’t gone incredibly crazy with buying more Blythes yet. I think that some of the fake Blythes are cute (I find some of the colour combinations are quite… odd at times), but at this time none of them have enticed me to the point of buying one to add to my Blythe collection. At least not like stock dolls have, considering the majority of my collection is all stock. Part of this is also due the lack of space, I’ve gotten more selective with new additions as my collection has grown. Funds don’t factor into my decisions, for the most part, because I save if I’m wanting a more expensive doll – either a custom, a stock doll, or a Kenner. For me, at the present time, I find that it if is something worth having, it is worth it to me to save up for it.
Do you find buying real Blythes worth it? Share your thoughts below in the comments.
Written on October 21, 2016 at 12:00 pm by Michelle
Filed under: Article with tags: 10 fun facts, kenner blythe
Think you’re a fan of Kenners? Here are 10 fun facts about Kenners that you may not already know:
- Kenner Blythe dolls were only produced for one year, 1972.
- There were 12 original outfits produced for Blythe.
- For Blythe’s accessories, Kenner produced 4 wigs and 4 pairs of glasses, and an orange carry case.
- Kenner Blythe has holes on the back of her ears that the original glasses were able to sit into (so they stay on!).
- Four hair colours were made with different hair styles (chunky bangs, wispy bangs, side part, centre part) – blondes only came with a side part.
- The Kenner Blythe dolls featured in the advertisements were prototypes and not the dolls sold.
- Original retail price for Kenner Blythe was less than $6 USD. With inflation, that is about $35 USD in 2016. For comparison, the average minimum hourly wage was ~$1.60 USD in 1972 vs. $8.60 USD in 2012.
- Kenner Blythe’s hair came in a braid to keep it together in the box.
- Prior to the release of This is Blythe by Gina Garan and the Neo releases by Takara, Kenner Blythe dolls were sold on eBay for ~$30 USD.
- In the original television commercial, the colours of Blythe’s eyes were referred to as: bouncy brown [orange], green eyes and groovy, purple pretty as you please [pink], and beautiful blue.
Kenners are pretty amazing as they have survived through years of being unloved – hidden away in attics and buried in gardens. They’ve survived a lot! And many of them haven’t made it through the years unscathed, what with the melt marks, cracks in the bodies, and being chewed on by children and animals.
What’s a fun fact that you know about Kenner Blythe dolls? Share below in the comments!
Written on October 19, 2016 at 12:00 pm by Michelle
Filed under: Article with tags: blythe on a budget
New Blythe releases get a lot of hype – I think the marketing team behind Blythe dolls really know what they’re doing by releasing the promotional illustrations and opening preorders at the same time. They follow up with the promotional photographs, but at that point it gets a little harder to get a preorder!
Blythe dolls aren’t inexpensive, but here are some tips and tricks for getting a newer release at the lowest possible price:
- Order the doll from an official retailer (e.g. Junie Moon International Online Shop, CC Toys). Some will price the dolls at the suggested retail price and have preorders either by lottery or not (Junie Moon), while others have ‘free shipping’ where the cost of shipping is added to the cost of the doll (CC Toys). There are other retailers, but they may inflate the price of the doll further.
- Do you have a friend who would love to buy the stock clothes and you’re not particularly fond of it? Split the doll with a friend! You get the doll, they get the stock (or vice versa). This knocks off some money off of the doll and makes her even more affordable. However, be very sure that you do not want the stock because it can be difficult to get your hands on it again.
- Check out online buy/sell groups (e.g. Facebook, Blythe Kingdom) to see if anyone has preordered the doll, received the doll, and no longer wants the doll. Bonus – you may be able to find a seller in your own country already, so you can save on the extra costs of international shipping, as well as custom fees.
- Buy online with a cash-back credit card, if you have one (or can qualify for one!). Many cash-back cards offer anywhere from 0.5-4% cash back. On a $400 doll, that is anywhere from $2-16 back. It may not be a lot, but it is something!
- Consider the different shipping options that you get. Some retailers give you options, for instance I noticed that when I get the option of EMS, FedEx and registered air mail, the cost of EMS is often less than FexEx. The time difference between registered air mail and EMS is often at least a week, or more. So depending on how patient you are, that may be an option for you (and it’s cheaper!). Do consider the fact that some carriers will add their own brokerage fees or extra charges for getting a package through customs for you (I find this has happened with UPS, FedEx, and DHL for me – I’ve never had that happen with EMS/regular mail). Whichever shipping option you go for – always ensure it is a method with tracking and insurance.
Do you have any tips and tricks for getting a new(er) release at a rock bottom price? Share below in the comments!


 BlytheLife.com opened in July 2010 and is a blog and resource hub for all things Blythe!