


 BlytheLife.com opened in July 2010 and is a blog and resource hub for all things Blythe!


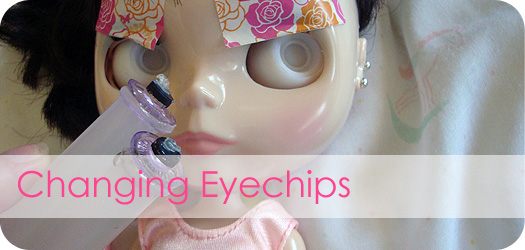
DIY Customizing: Changing Eyechips
Written on November 7, 2014 at 12:00 pm by MichelleFiled under: Article with tags: customizing, diy
DIY Customizing is an irregular series of customizing tutorials. These are tutorials for things that I am able to do for my Blythes and I try to make it as simple as possible so that you can do these easy customizations to your own dolls. I am not a customizer – professional, amateur or wishful thinker of any kind. If you’re a kid – ask a responsible adult for help. As always, safety first! BlytheLife.com is not responsible for any damage that you do to yourself, your doll, or your home (or wherever you’re customizing).
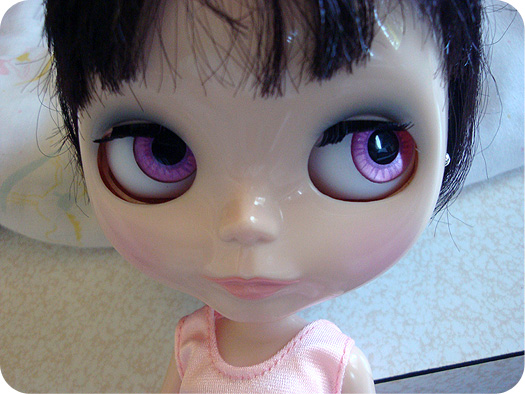
The eyes are a big part of what makes a Blythe unique. I bought a pair of handpainted eyechips at BlytheCon Seattle and I knew exactly who would be getting those beautiful pink chips.
To do your own eyechip change, you will need:
- Tape – masking tape or washi/paper tape
- Hot glue sticks
- Lit candle
- Water soluble glue (I use Aleene’s Original Tacky Glue)
- New eye chips
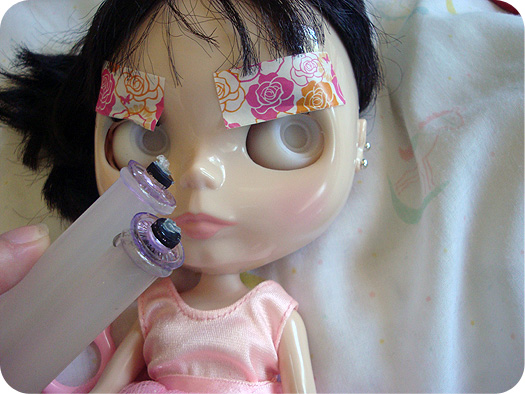
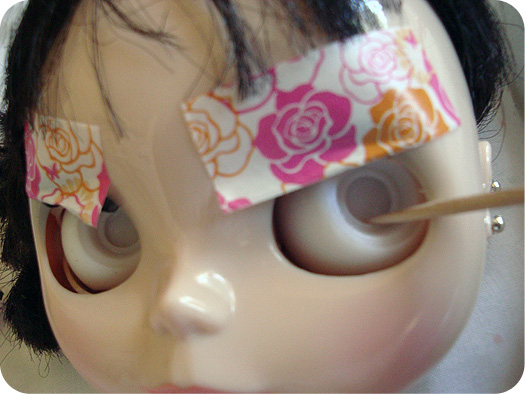
First I started by “prepping” my doll. With two pieces of washi tape, I taped her eyelashes back so I wouldn’t get glue all over them.
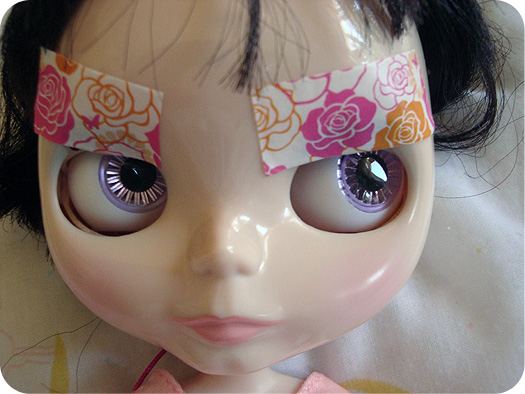
Yes, even the tape I use for Eden Mouse is pink!
I lit a candle, and then I hold the end of a glue stick close to (but not in!) the flame. I usually hold it until the end starts to look very clear.
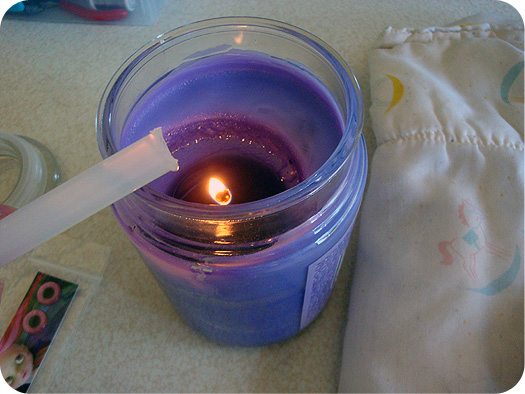
Then I press the melted end of the glue stick to the eye chip. I hold it in place as it cools. Repeat for both sides.

When the glue stick has cooled completely, I hold the doll head down and pull the glue stick with a twisting motion with my dominant hand.
Tip! Sometimes it take a few tries before you can successfully pull out the eyechips. Try, try, try again! And if that fails, send your dolly to the freezer for about 30 minutes with the glue sticks attached – sometimes that works!
Once the old eye chips are out, pat yourself on the back.
Using a tooth pick, remove any old dried glue residue where the old eyechip used to be.
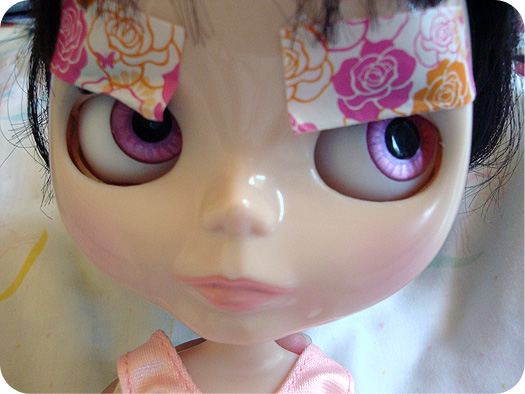
Once that’s done, I use the same toothpick (with the glue residue removed) and get some glue onto the end of the post of the new eyechips.
You can get new chips pretty much anywhere. Eden Mouse’s old lilac coloured eyechips are from Cool Cat. My dolls have a range of chips from a variety of places including: Brainworm, Cool Cat, GBaby and, now, Kaleidoscope Kustoms. Just remember that some chips don’t come with the post painted, so you’ll need to paint that yourself. I’ve found that black acrylic paint works great (which is super affordable and can be found at dollar stores or big box craft stores), as well as paint markers (a bit more pricey, but can be less messy and you don’t need a paint brush).
Tip! If you are using flat eye chips (without a post), you want to have the glue along the edges – this is the part of the chip that will be touching the eyeballs.
Then you put them into place so that the edges are flush with the eyeballs.
I typically wait several hours (sometimes overnight) before I start pulling on the string again.
[…] concept and technique are easy enough. I referred to the tutorials on Blythe Life and Jaszmade re: changing the eye chips. Finley came with standard orange chips that I really did […]
Is there a certain kind of glue stick you need to use? I’m trying to remove my factory girl’s eye chips and the glue isn’t sticking…
I just use hot glue gun sticks that I’ve bought at a dollar store. Nothing special about them.
Ugg i too tried to remove my factory blythe’s eyechips this way. it didn’t work. i ended up superglueing the glue sticks to her eyechips, and they finally came out. but it was risky business….