blythelife.com
blythelife.com

How To: Organize a Swap

Written on July 6, 2011 at 12:00 pm by Michelle
Filed under: Article with tags:

I’ve mentioned participating in swaps in the past as a good way of getting new things for your dolls. It’s basically trading: someone sends you a bunch of things for your dolls and you send a bunch of things for their dolls. There’s generally a theme, a list of likes and dislikes and even some requirements like “things for dolls only” or “handmade goods only”.

But let’s say that there isn’t an active swap going on, how can you still take part? You can organize a group swap!

Tip: If you’re going to be the swap administrator, you should be able to devote the time to organize the swap from beginning to end. If you cannot take on the task for the next swap, find someone who has the time and energy to do it!

First you need to get a group of people interested – you can create a group on Flickr (or another website) and let people know about it. It’s a good idea to have those participating voting on the overall theme of the swap (eg. flowers, summer activities, back to school, winter, etc.).

Before people sign up, you need to figure out how you will be assigning partners. Will you be using a swapping website like Swap-bot to help you determine partnerships or will you be manually assigning partners based on each persons’ requirements? Also, will you be privy to each persons’ address and other information or are you just assigning partners and making each person responsible for sending their mailing information to their swap partner?

You will also need to make up a list of rules, generally pertaining to deadlines and what happens if someone doesn’t meet a deadline. Are they banned from participating in future swaps, or just banned for the next one? Are people allowed to send food or candy in the mail? (Unfortunately, if people have partners in different countries, it’s probably not the best idea.) Remember that each country has different rules regarding amounts that can be received as gifts via post before the receiver is charged custom and duty fees. While it’s great to get gifts, it’s not cool to get custom fees on a swap package because someone marked it up high.

Let everyone know the deadline and remind people. We’re human, we can forget things. So every time you make an announcement regarding a swap, remind people of when the deadlines are. There should be a deadline for signing up, a deadline for mailing and everyone who participates should let you know when they have sent (if you are using Swap-bot, they won’t need to tell you as they need to let the website know when they’ve sent).

Tip: If tracking/delivery confirmation is an inexpensive add-on, you should encourage people to use it. In some countries, it can be quite expensive to add tracking onto a small package and unfortunately not financially feasible to be used.

Having a Flickr group or a forum group is a great idea because you can easily post up announcements or remind people of deadlines or to create new threads for people to post up photos of what they got!

Most importantly: have fun! You should give yourself a pat on a back for a job well done when your swap goes off smoothly. If you run into a snag (like, say, of someone who flakes), you can always ask for help in the form of a Swap Angel and hopefully you have some generous people in your swap group who are willing to help out and make a few extra things for someone who didn’t get their package!

Happy swapping!

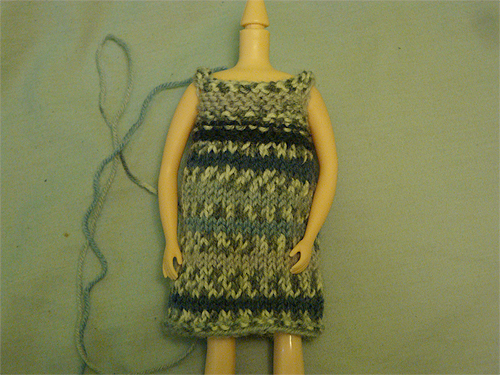
Blythe On A Budget: DIY Knit Empire Dress

Written on June 15, 2011 at 12:00 pm by Michelle
Filed under: Article with tags: , ,

Supplies Needed

  • 3mm knitting needles
  • Sock/fingering weight yarn (under 10g required [under 42m or 45.9yd])
  • Yarn/darning needle
  • Snaps
  • Sewing needle and thread (matching colour to yarn)
  • Ruler
  • Decorations (buttons, ribbons, appliques) – optional

Gauge:
3 st per 1 cm

Notes
The yarn used in the dress shown is Regia Jacquard Color 4-ply by Schachenmayr nomotta in colour #5176 (50g per 210m or 230 yards)
Total number of stitches per row mentioned in brackets [#] at end of the row.
Casting off is also known as binding off.

Directions
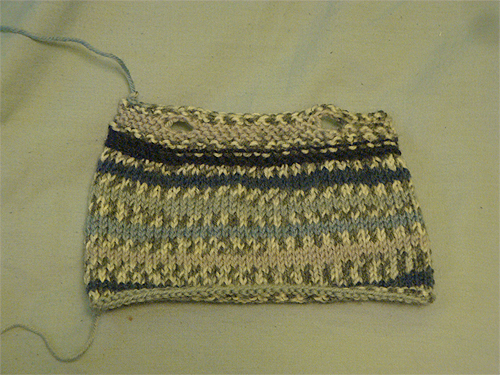
Cast on 54 (leave a long enough tail at beginning for sewing up the back of the dress; I use the long-tail cast-on)
Knit 3 rows (garter) [54]
Alternate knit and purl rows (stockinette) until total length is 7cm [54]
(On knit side, decrease row): *k1, k2tog* [34]
Knit 6 rows even [34]
Knit 7, cast-off 3, knit 14, cast-off 3, knit 7 [28]
Knit 7, cast-on 4, knit 14, cast-on 4, knit 7 [36]
Knit 2 rows even [36]
Cast-off

Use yarn needle to sew up the back (up to the decrease row).

Sew a snap at the top of the back of the dress, add decorations as desired.

Notes on Pattern Use
This pattern may be used for personal or commercial use provided that full credit is given to BlytheLife.com/Michelle for the pattern (please include a link to the website or pattern page in your sales description). This pattern is not for mass-production manufacturing. You may not sell or claim the pattern as your own. If you have any questions regarding these terms, please email Michelle at michelle@blythelife.com.

Summertime Photo Ops: Thoughts on Locations

Written on May 27, 2011 at 12:00 pm by Michelle
Filed under: Article with tags:

One of the nicest things about the summer season is the good weather. Good weather means little rain, little rain means less chances of eyelashes coming out from our favourite dolls. And to challenge myself (and others!), I’ve come up with a list of potential good photo locations to take advantage of this summer:

  1. Local botanical gardens
  2. Aquarium
  3. Parks (local, national, provincial or other)
  4. From the car window during a road trip
  5. Beach (be careful of water!)
  6. On a ferry
  7. From a plane window
  8. At BlytheCon in Portland (!)
  9. A neighbour’s garden (if it looks better than yours, if you get permission first)
  10. Playground for all those little-girl Blythes around

Blythe On A Budget: DIY Sock-Sweater Dress

Written on May 25, 2011 at 12:00 pm by Michelle
Filed under: Article with tags: , , , ,

When I was younger, my parents refused to go out and buy clothes for my Barbie dolls beyond what came with the doll herself. But I still wanted new clothes for my dolls so my dad used to sew some for me, just to placate me long enough for me to stop from whining more. One of the things he used to make for me was little sweaters and dresses from socks, so with his help I wrote this tutorial.

Pretty much all of the directions are his, minus the use of stabilizer (I have no clue how he was patient enough to sew doll clothes for me with socks without stabilizer, I had a hard enough time with it!).

You will need:

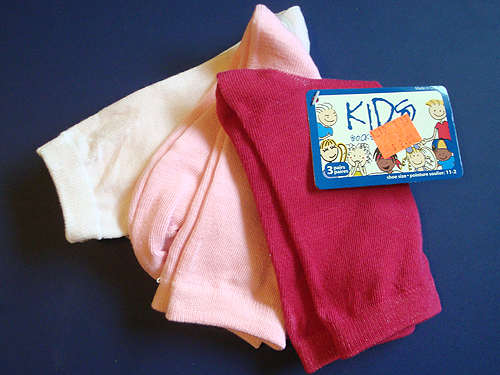
  • 1 sock (I bought mine from a local dollar store, kids sizes at 3 pairs for $2 CAD)
  • scissors
  • stabilizer (makes your life so much easier)
  • thread (either the same colour as your sock or similar)
  • pencil (or something else to mark fabric with)
  • pins
  • sewing machine

Click to read more of this entry.

Blythe On A Budget: DIY Trimmed Skirt

Written on May 18, 2011 at 12:00 pm by Michelle
Filed under: Article with tags: , , , ,

My wardrobe is the opposite of my dolls’. I have a lot of separates (shirts, pants, skirts, sweaters) while they have a lot more dresses than I will probably ever have (if only for lack of closet space). In my need for more separates to go with the small amounts of tops that I have for my dolls, I decided to sew a simple skirt that is very much modelled after a skirt that I have.

You will need:

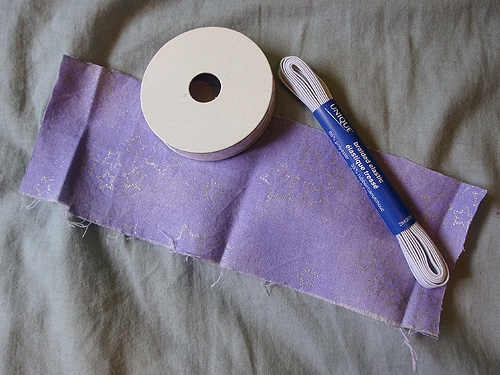
  • fabric – 8cm x 23cm
  • trim (optional) – 23cm
  • elastic – 3mm width, 9cm length (I got mine for $1.70 for 3.7m)
  • scissors
  • pins
  • stabilizer
  • safety pin (for threading elastic)
  • thread
  • iron
  • sewing machine

Click to read more of this entry.

« Newer EntriesOlder Entries »
blythelife.com
blythelife.com