What’s in a name?
For most of the visitors to your website, it will probably be the first thing that they notice as it’ll be part of the blog’s URL. It will also be what they associate with you and they need to be remember it. Let’s take for example the two following names:
Which one are you more likely to recall and remember how to properly spell again? Probably the second one.
In this day and age, most one-word domain names have been registered (some are even worth a lot of money!). A lot of two-word domain names are also taken, but not all of them (blythelife.com is a two-word domain and was registered in June 2010). If you need to go up to three words, that’s okay – as long as all the words are relevant. The shorter the words, the better – it’ll be easier for people to remember your blog address.
Getting a domain name is like you putting a label on yourself. You don’t need to have paid hosting for a domain name and it’s always a wise investment to buy one if you foresee yourself potentially moving onto paid hosting or if you just want to prevent people from snatching it (and posing as you or just having others thinking that the .com website is also yours!) and a lot of free webhosts will allow you to use a domain name with your free blogging space.
It’s highly suggested to get a .com name as that’s the one that most people think of when typing it into the address bar of their web browsers. A .com domain name goes for under $10 for one calendar year and there are a lot of different domain registars online where you can purchase a domain. BlytheLife.com is registered with NameCheap.com, which is a simple to use domain registrar (it includes 1 year of WhoIs protection with every new registration or transfer). There are a lot of other registrars out there, but I find NameCheap to be the simplest to use.
If you don’t think that you’ll be moving onto a paid host or that you’ll be using your blog for business (perhaps you start blogging about crafting and then move onto selling those crafts, a .com name looks more professional than being hosted by Blogger or WordPress), you can completely disregard what I said about buying a domain. But the name of your blog should still be relatively short and easy to remember!
So to recap what you should consider when choosing a name:
- It should be easy to spell and to remember
- It should be two to three words, maximum
- It’s suggested to register for a .com domain name if you can afford it
But that’s great, you’ve come up with a kickass name that isn’t too long and you can spell it (and perhaps you’ve gotten the corresponding domain name as well…). Now what to do?
Pick a host!
While I do love having paid hosting, I know that not everyone can afford it. There are some inexpensive paid hosts available – BlytheLife.com is hosted at Surpass Hosting (at $6/month). So if you can afford it, it is a nice option to have as you have complete control over your hosting as well as more space and can keep track of how many visitors you get and easily find out what days and times are the most popular for people to visit you and also how many countries that you reach!
But I know not everyone is interested in handling that (and if you’re just beginning, it’s probably not a great idea if you’re not sure how long you’ll stick with blogging – I still believe that buying your blog’s .com domain is a good idea though!). So I’m going to talk about 2 free (!!!) blog hosts that I’d like to suggest to you:
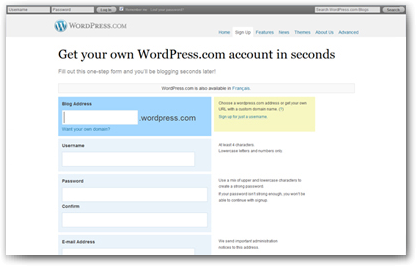
WordPress
One of the most popular blogging platforms is WordPress, it’s very easy to install and to use (the user interface is pleasant – I’m not just saying that because I’m using a WordPress-powered blog right now, I really feel that way!) and there’s a lot of plugins that you can use (if you have a self-hosted WordPress blog).
WordPress is free to download off of their website and you can install it to your hosting (provided you already have hosting or you’ve found someone to host you on their hosting space for free, what a generous person you’ve found!). Or, alternatively, you can have your WordPress blog hosted for free on the WordPress.com website. The pros to this is that it’s all free. The cons is that you are limited to what kind of things you can have on your blog (I’m mostly talking about the plugins and other fun pieces of coding that makes blogging easier, not the content itself – you’ll need to read the Terms and Conditions to find out more about what they will and will not allow on their website).
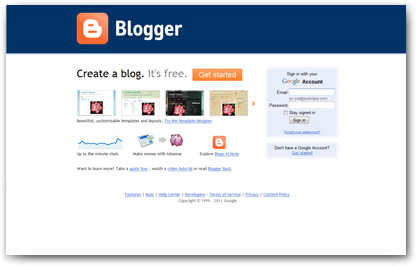
Blogger
Owned by Google, Blogger is a great website. It boasts a straightforward user interface, which includes easy to follow tabs to get you where you want to go. It’s also linked to other Google applications, like Picasa for easy photo-sharing. Google has also made it possible for you to work on blog posts in Microsoft Word and then you can save that word document directly to Blogger – which is pretty nifty.
Blogger is free to use, of course, and you can customize your URL with a domain name if you happen to have one. All Blogger accounts are set, by default, as subdomains of the blogspot.com domain name. One thing to keep in mind, because I’ve come across this on several Blogger blogs, is that some people set their comments preferences to not include people manually inputting names and URLs and instead require them to be logged into something – I would suggest allowing people to manually input their own data as it makes it easier on visitors (and will more than likely increase the amount of comments that you get).
Which blogging website you use is really up to you. Both of them have good pros and cons and you can find help for both websites available online (just use your search engine of choice!).
Nifty Note: For both Blogger and WordPress, you can export your blog posts if you choose to move from Blogger to WordPress (or the other way as well) or if you choose to move to a free host. When exporting your blog posts, it will save as a .xml file.
If you haven’t already, be sure to read part one (The Introduction). In two weeks, on March 7, 2011, Part 3 (HTML) will be posted.
- Part 1: The Introduction
- Part 2: Names & Hosts
- Part 3: HTML (March 7, 2011)
- Part 4: Themes, Templates & Design (March 21, 2011)
- Part 5: Promoting Your Site (April 4, 2011)


 BlytheLife.com opened in July 2010 and is a blog and resource hub for all things Blythe!
