blythelife.com
blythelife.com

Doll Blogger: Tips and Tricks #2

Written on February 22, 2013 at 12:00 pm by Michelle
Filed under: Article with tags:

This is a somewhat-intentional continuation of a post that I had published in January 2013 (cleverly titled “Doll Blogger: Tips and Tricks #1” as I figured I would eventually come up with more tips and tricks). If you missed it back in January, just click the not-disguised link to see what I wrote!

To CAPTCHA or not to CAPTCHA? That is the question.
CAPTCHA, for those unaware, are those really annoying things that you see when you’re trying to set up a new account or enter a password or okay a new comment on a blog. It’s usually a mangle of letters and/or numbers that make little to no sense that is required to be put in correctly in order to “prove” that you’re really a human (and not a bot). I can actually (sort of) understand having CAPTCHA for people to enter when they’re setting up accounts. You don’t want a million and three meaningless accounts clogging up a server. But for comments, you probably don’t want to have it around.

But “Why not, Michelle?” you ask? Because it’s annoying. As a blog owner, you want to make it easy for readers to comment and to publish their comments. Things that make it difficult (e.g. passwords, CAPTCHA, needing to log into something) hinder readers from commenting and make it less likely for them to do so. As a blog owner, you also want commentary. If you didn’t, you’d be writing in a paper journal and not all over the internet. Bonus, in WordPress there is a plugin called Akismet. It’s very handy, filters out the spam and it can “learn” from what you tell it is spam or not spam.

Making it easy for readers to comment in Blogger.
By default, your readers (if you have a Blogger/Blogspot blog) need to log into some account prior to making a comment. (Please refer to my CAPTCHA bit to see why this is a bad idea. Got it? Great!) So if you want to make it easier for people to comment (which is a good thing, unless you’re a hermit), that’s great! Log in. Pick the blog you want to change the setting for, click “More Options” (it looks like a down-arrow), then click on “Settings”. After the page loads, go to “Posts and comments”. What you want to look for is a section called “Who can comment?” and then click on “Anyone”. This allows people who are not logged in to comment – making it easier for commentors to give you feedback on your post. And for a recap:

More Options > Settings > Posts and comments > Who can comment? > Anyone

Blog Planners: Yes or No?
I’ve noticed, not really in the dolly blogging community, that a lot of people use blog planners. What is a blog planner, you ask? Very good question! If you look it up via Etsy, you can find a bunch of examples (alternatively, if you’re cheap frugal, you can Google blog planner templates and print your own or make your own, adjusted for your own personal use). Basically what it is is an agenda (like for school) but it outlines monthly blogging schedules (much like the WordPress Calendar plugin I talked about in Tips and Tricks #1), but you can also include information on posting ideas, if you’re doing a giveaway (either sponsored by you or someone else). Here are several that I really like (each word is a separate link to a different blog planner template! All free and printable!). If you want to use less colour ink, you can always print in black and white. I will be publishing a Blythe/dolly blog-themed blog planner template (weekly style) very soon. After I finalize what I need/want in a blog planner template and then I’ll share it with all of you!

Using blog prompts to help with what to blog about
I’m personally a fan of blog prompts. I don’t use them very often (mostly because blog prompts come out on a weekly basis and I blog so much more than once a week!), but a lot of people do – and sometimes the topics can be very interesting and thought provoking! One of my favourite methods for prompts for writing (not on this blog, I’m afraid it wouldn’t work!) is to take a dictionary, randomly flip to a page and then (as randomly as possible) select a word. Then, somehow utilize this word in the blog entry or use it as inspiration to come up with a post. It’s interesting to see what you can come up with! Plus you can expand your vocabulary at the same time.

Doll Blogger: Tips and Tricks #1

Written on January 9, 2013 at 12:00 pm by Michelle
Filed under: Article with tags:

From time to time, I get asked why I decided to do a blog about Blythe. There was a simple reason really: because I could. I’ve been blogging in some form or fashion since about 2003. Back then, the blogging platform that a lot of people used was Greymatter (I blogged from 2003-2006, then took a break and in 2007 I started blogging again in WordPress!). So with my years of knowledge, I’ve compiled a list of tips and tricks for (dolly) bloggers and hopefully you’ll learn a little something!

Get organized, stay organized
I utilize WordPress plugins when I can. I use self-hosted WordPress (so your mileage may vary if you’re using WordPress.com to host your WP blog) so I’ve installed many plugins to keep my blog running smoothly. The most handy of the WP plugins that I use has to be WordPress Editorial Calendar. I use it to have a quick glance to make sure that my posts for the week are in fact scheduled and not in draft status, and to easily scroll through and see what I have upcoming for BlytheLife in terms of posts, giveaways and other excitement.

Photo editing can be done without fancy programs
When I suffered some computer malfunctions, I had to turn to internet-based photo editing programs while I was still working on installing my much-used programs yet again. My favourite alternative to Adobe Photoshop has got to be Pixlr. Pixlr is also available as an app as Pixlr Express and Pixlr-o-matic for both Android and Apple products. I use the online version a lot (but I also use Pixlr-o-matic on my phone and you can create some fun effects!) to do some quick editing. If I just want to do a little colour boost and add a white border, I tend to turn to Pixlr now just for the efficiency. However, for more detailed work, I still use the program that I’ve always loved – Photoshop, but that’s not free! It’s really easy to resize, crop and add text to photos with Pixlr – I’ve even used it for images that have ended up on the blog! Here’s an example of a photo that I edited using Pixlr (left is before, right is after).

Teehee. A little spooky?

Give yourself a schedule, any kind of schedule
If it’s one thing that I think bloggers should do – and I’ve been guilty of not doing it (not here) – it’s to stay consistent. Nobody wants to start following a blog and then have the blogger fall off the face of the earth. Sometimes it’s unavoidable, but sometimes it is! Not everyone can blog every single day (I know that I can’t!), but you can blog once a week, twice a week, twice a month – whatever your schedule is, try to keep it regular. That way your readers can anticipate when to come back to visit you and you can give yourself a goal to meet. For me, I tend to have posts go up three times a week. However, I don’t necessarily write three posts per week. Scheduling the posts in advance helps me to keep to my schedule, and it also helps me get content up while I’m in school. For instance this post was written on December 29th, 2012 and I’ve scheduled it for the day that it published (January 9th). Technology sure is marvelous!

Make it easy for people to follow your blog
The great thing about the internet, and pretty much all web browsers, is that it’s really easy for people to follow your blog. They can book mark it or add it to whatever RSS feed that they happen to be using to keep up to date on the latest blog posts. However, you should at least make it easy for them to do so! BlytheLife uses FeedBurner, now owned by Google, which allows an easy way for people to add this blog to their lists of blogs that they read. When added, they will find out when new posts are up. The easier it is for people to follow your blog and to find out when new posts are up, the more likely they are to read it!

Blythe On A Budget: Blogging on a Budget

Written on April 18, 2012 at 12:00 pm by Michelle
Filed under: Article with tags: ,

I’ve done a series on blogging, and also another post on dolly blogging, but I thought I’d take another crack at it by looking at blogging for those who have no money to spend or a little money to spend. Blogging is a great way to get your information out there for others to read. A lot of crafters who sell things in the Blythe community have their blogs so they can show off new designs, progress of crafting for conventions or new shop updates. Blogs are also great for showing off customization progress, experimentation, photo stories or just your life in general – doesn’t even need to be doll related.

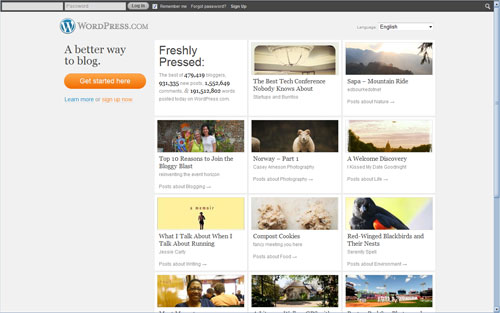
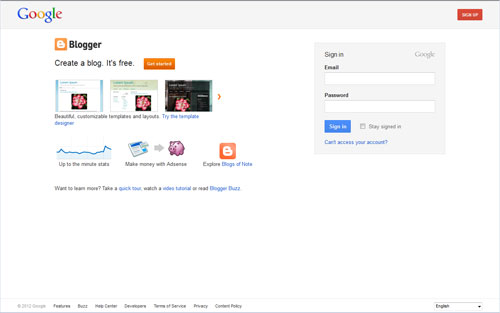
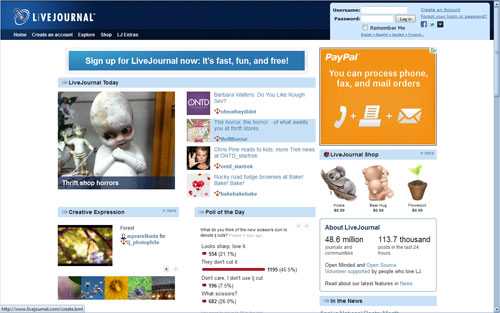
For those who are looking for free options for blogging, the ones that I like are WordPress, Blogger and Livejournal. All of them are free options for blogging and have their own pros and cons to deal with.

WordPress

I’m a fan of WordPress (WP), so I may be a touched biased. You are limited when you have a free WP account though. You can write pages and posts, but no additional plugins (which can be very useful, if you know your way around WP). WP also has it written into it’s terms and conditions/terms of service that you cannot advertise/sell on their sites. However, if you know someone who’s willing to host you, or if you can self-host your own WP, you can sell and install as much stuff as you want onto your WP. So if you decide to go from the free WP hosting to your own domain, it can be pretty easy to export all of your content and them export it into the new site. Comments can be left by anyone by default, which is pretty nice, and WP has a fantastic anti-spam plugin already with your blog when you start an account (it’s called Akismet).

Blogger

If you have a Google account, it’s super easy to set up your Blogger account as it’s the same log-in details as your Google account. One thing that’s great about Blogger is that there are a lot of free themes out there. I haven’t gone through the TOS of Blogger, but a lot of people set it up for ‘sponsors’ and paid-ads, so it would appear that it’s okay to make money while having a blog site with Blogger. One thing to watch out for is that you should set it so that comments are open to anyone to leave – not just people logged into some kind of account. If you don’t, it’s very easy for people to get turned off from leaving comments. Blogger also has the capabilities to easily use your own domain name with their server, which you can technically do with WP and LJ as well

Livejournal

Livejournal has been around for a long, long time. A lot of people still use it, although it’s not as popular as it once was. It is posts only, no separate static pages. You can also join LJ groups that are related and cross-post easily into various groups. For example, you can cross-post in various crafting and doll groups without leaving the site at all. LJ allows for commenting from other LJ users and I have seen ‘anonymous’ posting allowed, so those without accounts aren’t left out (provided you don’t have private posts).

And now, onto the paid options. That would be a domain name, being hosted on someone else’s domain (it’s usually free), or paying for your own hosting.

Domain Names

If you’re serious about having some kind of business or have a business name in mind, I would recommend getting it. I wouldn’t risk someone else buying it out from under you and then just squatting on it while you’re forced to use something else that is not the same as your existing Etsy/Artfire shop or screen name. Buy it now and save yourself the hassle of having to add various descriptive words later. Most domain names are under $10 per year and you do need to renew annually if you don’t purchase it for multiple years at a time. You should be able to find a registrar for a .com/.net/.org domain name for $10USD or less. Some extensions (.nu, for example) are more expensive, but they’re not as commonly used.

Also, getting a .com is always highly recommended. Most people think to write .com first before thinking of .net, .org or .co.uk. It’s just the way the world works. Domain names can be fairly inexpensive. I personally use Namecheap¹ for buying all of my domain names. They have monthly promo codes and the month of April 2012 is RACETO3MM for all new registrations and transfers for com/net/org/biz/de extensions.

Sub-Domain Hosting

This is generally free, as you’ll be using someone else’s space (but also part of someone else’s name!). Your URL will look like www.friend’sdomain.com/yourname. On one hand, it’s great if their site’s name is related to yours or makes it easier for people to remember. On the other hand, you do run into the problem that you will inadvertantly run traffic to their site as well, and if you decide to move to your own domain later on (yourname.com), it can be difficult to have people get used to a new site URL or to even get them to change their links.

Paid Hosting

Please, please, please, please, please don’t use a site that tells you that you get “unlimited” everything for $1 a month. Many sites that offer super low costs for a lot of features are often hosting sites that end up going under. Definitely try to find a website that has established users and ones that have 24/7 support available. I have nothing against newer hosting companies, but I would highly suggesting reading testimonials and reviews on sites like Web Hosting Talk, where people talk about various hosting companies and leave public reviews. You should find a reputable host that offers what you need, but also has a good reputation for having a good support team and decent up time. A lot of hosts boast having 99.9% up time, but it’s always a good idea to check in reviews if this is true and to see the quality of their support team. You should be able to find inexpensive hosting that meets your needs (with support, up time and decent size of bandwidth and space) for $5 a month or less (unless you plan on hosting a lot of photos and videos).

Be realistic about what you need in terms of space and bandwidth. BlytheLife.com has quite a bit of pages and posts for the time it’s been up and running on the internet, but when I look at how much space it takes up on my hosting account, it is not very much (with the posts and all the other files, including photos, it’s less than 150mb). As for bandwidth, which does fluctuate, the site uses approximately 6-7gb per month. It’s fairly low compared to a lot of other sites because it is primarily text based and I don’t host videos. Unless you’re planning on uploading high res photos or large videos, you probably won’t need as much space or bandwidth as you think that you will.

BlytheLife.com is hosted on Surpass Hosting² and I’ve used them exclusively since 2006. I’m on a plan that is no longer listed on their website because they’ve restructured their plans after they established servers in the UK as well as in the US. Their support team has always been fantastic though and I always get replies fairly quickly (plus, when one of my sites got hacked, they fixed it up good as new within 3 hours of when I emailed them about it!).

¹² If you use the link to Namecheap or Surpass Hosting from this post, it includes my affiliate codes. Any funds earned go towards the costs of keeping BlytheLife.com up and running.


Doll Blogging Part 5: Promoting Your Site

Written on April 4, 2011 at 12:00 pm by Michelle
Filed under: Article with tags:

You’ve done it. You came up with a stellar blog name, you learned a little bit of HTML and your blog? Well, it looks fantastic. But you do a few posts and no one comments. In fact, the only person who seems to visit your site is you. What’s wrong with this picture?

Well, unless you planned to make your blog for complete private and personal use only, you need to let people know about your new website!

Make your blog visitor-friendly
You should follow a schedule when posting, it does make it easier for people to know when there will be new material. For instance, BlytheLife.com will generally have at least 3 posts per week (Mondays, Wednesdays and Fridays). I follow a schedule and even schedule the posts to go up at generally the same time all the time (12:00pm Pacific time). Include some information about yourself, have an RSS feed button somewhere that’s easily accessible for those that want to add you to their RSS feeds. Make sure that commenting is enabled.

If you are on Blogger, make sure that you set it so that people who don’t wish to log into their Google account (or any other account) can actually comment on your blog entries. If they can’t comment without taking extra steps, they probably won’t. You need to go to the page about Comments settings and enable it to allow everyone.

If you’re on WordPress, you can install a plugin that makes your site mobile-browsing friendly (it’s called WordPress Mobile Edition).

Lastly on making your site more visitor-friendly, always always always resize your images. I’m not just talking about adjust the height and width of the image itself, but actually resize the file size. You can save files optimized for web-use in Photoshop and most other image manipulating programs. This not only helps your site to load faster but to use less bandwidth overall (very important if you happen to either pay for your own hosting or have a limited amount of bandwidth on a free account somewhere).

Utilize Social Media: Twitter
A great way to do this is if you happen to have some people following you on Twitter. Every single time you have a new post, tweet it with the URL. In fact, tweet more than once. No more than few times before people start getting annoyed at you only tweeting your own blog  and unfollowing you though, because that would defeat the purpose. You’ll want to include in your tweet the URL of the blog post and either the title of your blog or the title of the blog entry.

Utilize Social Media: Flickr
Another way of getting some people interested in your blog is to take a screenshot of your blog (press the “Print Screen” or “prt sc” key on your blog, paste it into an image manipulating program of your choice and crop as you see fit) and put it up on Flickr. And don’t forget to include your URL. This works best if you have a lot of people who have you marked down as a contact, but you can always include the screenshot in relevant Flickr groups.

Utilize Social Media: Facebook
It doesn’t matter if you’re actually friends with everyone that you have added as a friend (I have a relative that I’ve never met before in my life added on Facebook, but she can’t view everything so that’s great). If you’re okay with people on Facebook knowing about your new blog, announce your blog as a status update and include the URL as your website link in your profile information.

Comment on other blogs
Say what? Comment on other blogs? Yes! There’s a great sense of karma in the blogging world, where if you comment on a blog (and if that blog author has the time), you’ll get a comment back! Now, this only works if the person can find something to comment on (which leads you back to making your blog visitor friendly) and if they can find something that they feel that they need to comment on. Don’t be surprised if not everyone who comments on your blog will comment back – sometimes they just can’t think of anything to comment on.

Final thoughts…
Blogging should be fun! But sometimes it can be a lot of work, especially if you want to keep up with the trends or just feel that you ‘need’ to blog. It’s always okay to take a little blogging vacation from time to time, but be sure to tell people about it on your blog and to let them know when you plan to be back.

If you found the Doll Blogging mini-series helpful, please let me know! If you  have any suggestions for another mini-series, please let me know on the suggestions page. If you created a blog and want to see it linked on BlytheLife.com, check out the links page.

If you haven’t already, be sure to read the first four installments of the Doll Blogging mini-series!

Doll Blogging Part 4: Themes, Templates & Design

Written on March 21, 2011 at 12:00 pm by Michelle
Filed under: Article with tags:

Part of the fun of blogging is having a blog that stands out from everyone else’s, so today’s installment of the Doll Blogging mini-series is to go over colours schemes, templates and themes (yes, there is a difference!) and design tips that you can use to make your blog really stand out.

Colour Schemes
One of the most basic colour schemes is to have a white background with black text, I use this on BlytheLife.com. It’s consider basic because many people use it (including many professional websites) and it’s easiest for those who may have visual disabilities to view. Of course, you’re not limited to just using black and white and you can use other colours as well.

A lot of colours go well together. If you take a look at a colour wheel, you can find colours that generally go well together quite easily. Colours that lie opposite of one another are complementary (eg. blue and orange; red and green; yellow and purple/violet), primary colours are red, blue and yellow, secondary colours are violet (purple), green and orange. The colours you pick will reflect on the general feel of your blog and writing. If you customize Blythe to look gothic or dark, you might want to go with a darker colour scheme. If your dolls are constantly wearing cute things with lace and pink, you might want to go with a lighter colour scheme (perhaps pastels?).

It’s important to use colours that are different enough to ensure that your visitors can read the text (what’s the point of them visiting your blog if they can’t read it?). So things to avoid would be any neon colours on a white or black background, a light colour text on an even lighter colour background. You want to make things easy for your visitors to read because you have a very narrow window of opportunity to convince your visitor to stay and read your website – if they can’t read it, they won’t stay and they probably won’t be coming back.

Themes and Templates
Themes and templates are generally interchangeable on some places on the internet, some people think that there’s a difference while others think that the words are pretty much the same thing. And, to be honest, they’re kind of just the same to me!

Themes and templates exist to make the whole layout-designing process a lot easier. For those who aren’t web designing-inclined, you can use a template or a theme to make your blog reflect your personal style without really having to make it all yourself. They are generally precoded layouts and all you really need to do is follow the instructions given by the person who created it.

Most layouts for WordPress are referred to as ‘themes’ while many for Blogger are referred to as ‘templates’, so there may be a small difference in them after all (although not that great). If you have the know-how, you can replace the images used in the precoded layout with an image that you created yourself. However, if you’re not comfortable with touching the coding, I would suggest that you leave it alone or make sure that you save a copy of the original and work off of a copy of the coding (just in case something goes wrong!).

Templates and themes are available in both free and paid versions. Free versions are generally fairly simple, most designers don’t generally offer a lot of technical support with them (and if they do, it’s usually the same information provided to you in a Read Me file, or something like it). Paid versions can range a lot if price. Very basic paid-for layouts may be under $30, but fully customized to your very liking can go up to several hundred dollars (definitely not a cheap option!). However, paid-for layouts will generally get you a lot more technical support.

General Design Tips
No matter if you decide to go with a theme or to tweak a template to your liking, there’s a lot of things beyond that layout that you should consider doing (and not doing!) when creating a website. Things like music, javascripts, flash images, etc.

A lot of people like music and a lot of people like internet. But not everyone likes them together. If you absolutely must have music on your website, you should have controls that are easily visible to the visitor for them to stop it and start it. It should also not automatically play when anyone visits your website. Your visitor may already have music playing or have their volume turned up with no music playing (and not expect to have music suddenly blaring at them). Also, having music auto-play will make your site load slower! And in this day in age where everyone wants faster connections and the information now, they’re not going to want to wait for that.

Javascripts and Flash images are great. They are. They make things pretty, animated, occasionally interactive. They also make your site load slowly. Very slowly. Some people have Javascripts disabled, some people cannot view Flash on their computer. In other words, the majority of the design that you decided to go with for your website cannot load. And what’s the point in that if it’ll take a long time to load and it can’t be properly viewed as you wanted it to be? I’m sure your Javascripts and Flash images look great, but they have a time and place for everything and that place really isn’t your dolly blog (besides, you should be showing off photos of your dolls instead!)

If you haven’t already, be sure to read parts one (The Introduction), two (Names & Hosts) and three (HTML). In two weeks, on April 4, 2011, the conclusion to the mini series, Part 5 (Promoting Your Site), will be posted.

Older Entries »
blythelife.com
blythelife.com