


 BlytheLife.com opened in July 2010 and is a blog and resource hub for all things Blythe!


DIY Customizing: Changing Pullstrings (Without Opening the Head)
Written on September 26, 2014 at 12:00 pm by MichelleFiled under: Article with tags: customizing, diy
DIY Customizing is an irregular series of customizing tutorials. These are tutorials for things that I am able to do for my Blythes and I try to make it as simple as possible so that you can do these easy customizations to your own dolls. I am not a customizer – professional, amateur or wishful thinker of any kind. If you’re a kid – ask a responsible adult for help. As always, safety first! BlytheLife.com is not responsible for any damage that you do to yourself, your doll, or your home (or wherever you’re customizing).

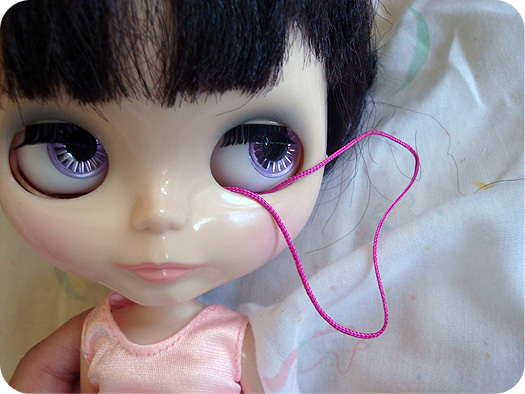
One of the challenges with some Blythes (notably Kenners, BLs, EBLs, some SBLs and some of the newer releases) is that it can be a pain in the bum to get their heads open if you want to do anything in there. One challenge that I faced with one of my dolls, Belarus, was the fact that her stock pullstring was fraying. So I changed her string. She is an EBL and at the time I was not up to the task of opening up her head (I’m still not), so I had to do it without actually opening her head. It can be tricky, but I wanted to show how I did it.
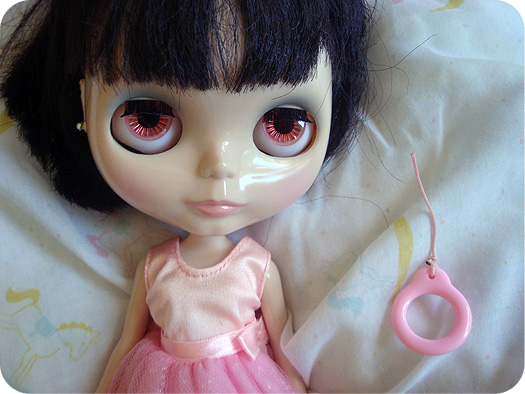
Now, Belarus doesn’t need another string, but Eden Mouse’s string had broke once or twice since I had changed it to a light pink cord. It’s super short now, and I wanted to swap it out for a darker pink cord (but still keeping the same pullring). Eden Mouse is a Punkaholic People RBL, which means that it is relatively easy to open her up, if I wanted to. I opted to keep her head closed for this tutorial.
This is just for changing the pullstring for the string that changes the eyes, not the string (if your doll has one have one) for sleep eyes. I haven’t figured out a way to change that without opening the head (if your doll no longer have a spring), so you’re flat out of luck there.
To change your doll’s pullstring, you will need:
- Scissors
- Lighter (or lit candle)
- New cord
- Super thin wire (or a u-shaped upholstery needle)
- Fishing line or nylon thread
- Wire cutters (if using wire)
- Well lit working area
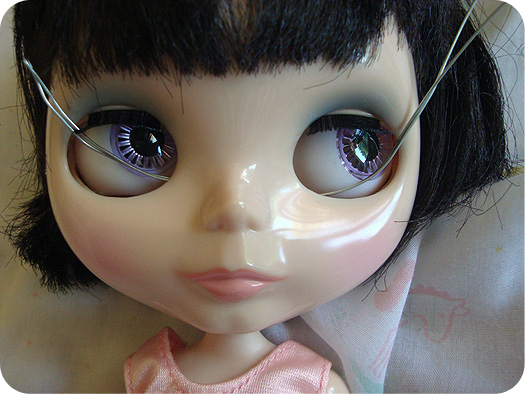
Let’s say that your doll’s string just broke, or the knot inside loosened so it came straight out. So what I did here was just snip Eden’s string.
If your doll’s string broke, I know this is the point of complete sadness. If you love the chips that are currently up, handroll them to chips that you either don’t like or don’t like as much – just in case you scratch them during this process.
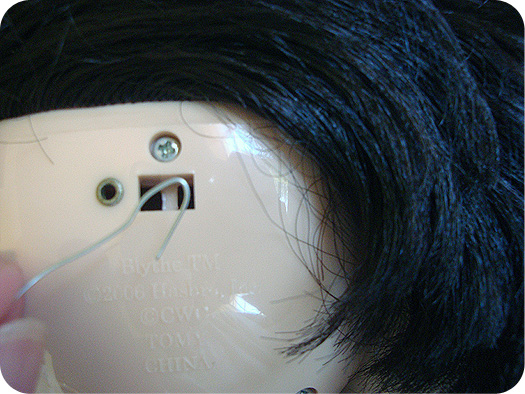
The first thing you need to do is remove the old string inside of the head. I used wire and poked it out. The knot should lie on the left hand side (if you are facing the doll, that would be your left, not her left). Just poke it out until you see it come out the eye hole. Remove the old string.

Now comes the fun part – stringing the eye mechanism again! To prep for this, cut the length of pull cord you want and melt both ends (you can always trim it later. Knot it on one end.
You want to feed the string back through the eye mechanism. If you have a u-shaped upholstery needle, this can be easy peasy once you get it through at the right spot (if you’re curious, I’ve found u-shaped needles at my local dollar store for $1.25 and it comes with regular sewing needles as well, but I do like a challenge!).
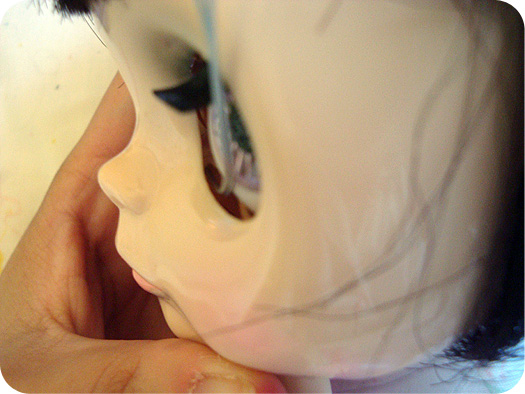
I folded my wire and then curved it into the shape of a U. I wanted the loop to be on the side where I want the knot, so I threaded it through the eye mechanism. Once you get the cord through the eye of the needle, or your wire loop, you want to pull through to the other eye socket.
Tip! To test if you have the wire or cord through the correct part of the eye mechanism, handroll the eyes down a little bit. If your wire (or needle) or cord moves down, you know you have it in the right position.
Now comes the fun part. You want to put all of the cord into the head.
If you turn your doll over, you’ll see there are two holes – one where the cord normally comes out and one where the spring for the eye mechanism sits.
Using your wire, shape it into a hook and insert it into the hole for the spring mechanism – fish out the cord, then pull it all the way out. You want the cord to come out of the left square hole of the two spring holes.
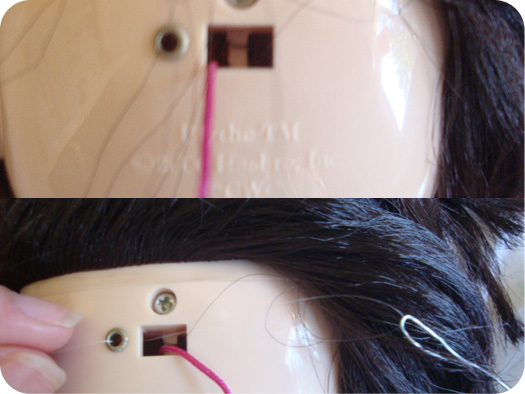
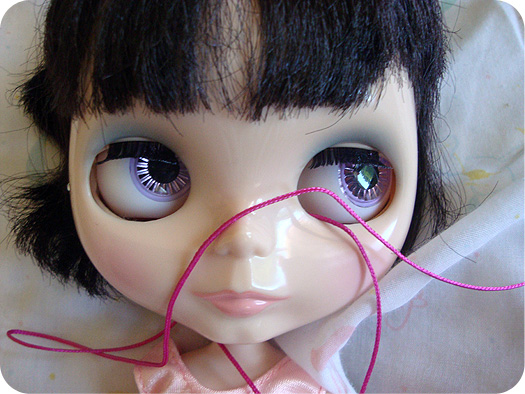
Using a length of fishing wire, form a loop and insert this into the hole the cord is supposed to come out of. Using your wire hook, fish the fishing wire loop out through the hole for the spring.
Tip! I use fishing wire or nylon thread because it is a lot stiffer than regular sewing thread and also stronger. You can try it with regular sewing thread if that is what you have available.
Insert the new cord into the fishing wire loop, and then pull the fishing wire loop until the new cord comes out the correct hole in the back of your doll’s head.

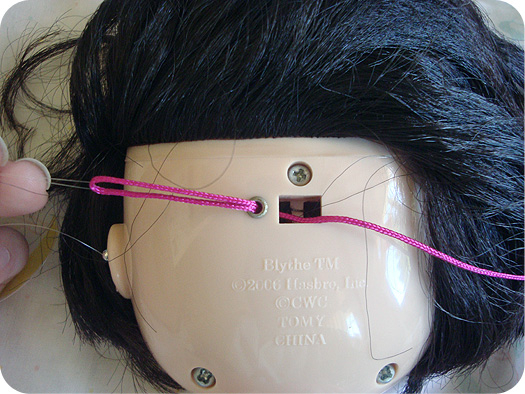
Trim the cord (if needed), melt the end again (to prevent fraying) and tie on your pullring (or charms!).
And tah-dah! Your doll has a new pullstring and you didn’t even need to open up her head.
Wow! Skillz! I bet people will find this really useful!
Thanks for this tutorial! I have always been a bit nervous to open up my girls heads, and now I can change the string without having to. Now, to shop for strings and pull-rings…^_^
[…] I am in serious trouble should the thing snap, since I can’t manage to open her up. I found this tutorial on Blythe Life that explains how to change the pull cord without opening the doll’s head, so I guess […]
Oh I’m so glad someone sent me this tutorial after my Kenner Blythe’s cord broke! I haven’t tried to fix yet but I’m excited to get her a new cordd! Thanks!!
This is wonderful! Thank you for keeping this site up.