blythelife.com
blythelife.com

Blythe On A Budget: DIY Photo Backdrop

Written on August 20, 2014 at 1:00 pm by Michelle
Filed under: Article with tags: ,

20140820

A big part of writing BlytheLife is that I get to learn about a whole lot of stuff. Including my adventures in sewing, knitting doll-sized cardigans, and taking photographs. Now, I took photos before Blythe, but I rarely used macro settings before dolls, nor did I have a model to take photos of. Here’s a super simple way of doing a photo backdrop that you can do with things you may have in your house. Alternatively, a trip to the dollar store will fix you right up!

You will need:

  • Foam board – 2 pieces if you are not using a table
  • The backdrop – you can use scrap booking paper, wrapping paper, anything! – Optional
  • Glue stick or sticky tac/blue tac/temporary adhesive (if you’re using some kind of pretty paper) – Optional
  • Clothespins
  • Something to photograph

20140820a

Directions:

Get your backdrop imagery onto your foam board, if you decide to use one. You can use scrap book paper or wrapping paper, whatever you’d like. This is optional.

Wait for it to dry. Go browse the internet for new dolly shoes.

Dried? Excellent! I opted to keep mine all white so there was no added drying time.

Clip your clothespins onto the bottom edges of the foam board, as pictured. I used additional clothespins to make it more stable.

20140820b

20140820c

Now you have an upright photo backdrop for all your photo taking needs. Go take some photos! And when you’re done, simply unclip the clothespins and store your photo backdrop flat somewhere for safe keeping.

20140820d

The great thing about this set-up is that it is so easy to set up and to tear down. If you want, you can also position lights on either side to reduce the amount of shadowing. Here’s a photo I took of Prim with my DIY photo backdrop:

20140820e

Blythe On A Budget: Framed Art with Cards

Written on August 6, 2014 at 12:00 pm by Michelle
Filed under: Article with tags: ,

20140806

What’s a doll collector to do when she has a pile of Moo and business cards collected? Turn it into art! This is an easy little DIY that helps to showcase your favourite Moo cards.

I started this project before BlytheCon Seattle, but I actually did not have enough cards (does this maybe mean that I need to shop more? I think it does!), so I had to wait until I got back to reassess how many beautiful cards I had to use. Lo and behold, I had more than enough (and some extra for the start of another frame!). I mostly used Moo cards for this project, but my next one is definitely going to featuring postcards and traditionally-sized business cards since I have so many of them (and they’re beautiful!). This is an inexpensive project that allows you to make something pretty from the collected cards that you already have on hand, I hope you enjoy. Click to read more of this entry.

Blythe On A Budget: DIY Easy Tutu

Written on July 30, 2014 at 12:30 pm by Michelle
Filed under: Article with tags: , , ,

20140730

When it comes to crafting for dolls, I like things that are cute and easy. When it comes to this tutu, there could be nothing easier! You can be creative as you want with combinations of colours, the sky is the limit when it comes to these little tutus. They can be worn as a skirt, or a petticoat to add some volume under your favourite doll dress. Bonus: if you had longer strips of tulle, you could make a tutu for yourself and match with your doll!

You will need:

  • Tulle, or fabric
  • Scissors
  • Ruler (optional)
  • Elastic band/hair tie/ribbon – the elastic band or hair tie will need to fit around a Blythe’s waist

20140730a

Directions:

Cut off a piece of tulle, I measured out two full ruler’s length  – approximately 60cm (or 30″). If you need more, or you’re making a tutu for a larger/smaller doll, adjust the length as needed.

Fold up the tulle so it’s easier to cut it straight (if you’re challenged like me!)

20140730b

Cut it in 1″ increments, all the way down. You can eyeball this, if you’re confident.

Fold each piece in half. Is it too long for your doll? Cut it in half again!

20140730c

Fold each piece in half, put the ‘loop’ into the elastic (or along the ribbon), pull the ends through the loop and pull it snug. If you’re using ribbon, you want the length to be long enough that you can tie a bow around your doll’s waist.

20140730d

Repeat all the way down the elastic or along the ribbon until you have enough to go around your doll’s waist.

20140730e

Put it on your doll! Take photos and have fun!

20140730f

Blythe On A Budget: DIY Felt Clutch

Written on July 9, 2014 at 12:00 pm by Michelle
Filed under: Article with tags: , ,

2014709

What does every doll need? Some kind of purse to hold all her hard-earned money, and credit cards, of course! And with a project so easy, your Blythes will easily have a whole rainbow of clutches, one for every colour outfit imaginable.

You will need:

  • Felt – any colour
  • Needle and sewing thread – I used white to better show my stitches in this tutorial
  • Scissors and craft knife (if you have one) – if using a craft knife, use a cutting board!
  • A bead – I would recommend a contrasting colour to your felt

Click to read more of this entry.

Blythe On A Budget: Savvy Doll Shopping

Written on April 16, 2014 at 12:00 pm by Michelle
Filed under: Article with tags:

Everybody loves a deal, especially when it comes to the pricey, non-essential purchases like Blythe. What are some of my best tips when it comes to being a savvy doll shopper? Here are a few to keep in mind when it comes to dolly shopping – especially when you’re looking at listings on forums or Facebook groups:

Window shop. Like when it comes to non-dolly purchases, it’s always a good idea to have a price range in mind for certain items. For instance, Kenners have such a huge price range – I’ve seen everything from $500 to $1500. Different hair colours, condition of the body, and clear/fused chips make all the difference when it comes to price. This also goes for stock dolls, light customs and completely overhauled dolls by certain artists. Window shop first – get a feel for the doll. If a doll by Customizer A only goes for around $600-700, why on earth would you jump on a listing that says $900?

20140416
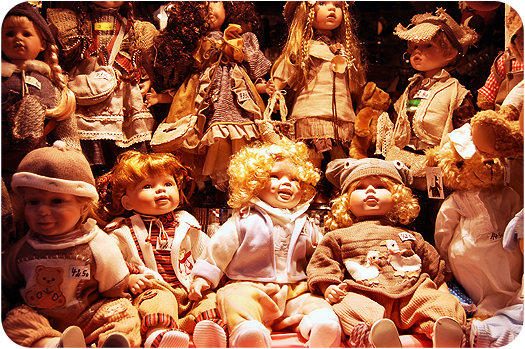
How much is that dolly in the window?
Image from sxc.hu user sloopjohnb

Don’t be afraid to negotiate a price. If you think a doll is a bit overpriced, and you’d be willing to pay a slightly lower price – just ask! The worst that the seller can say is no. And even then, you’re not out any money. Negotiate. Ask if they can include the shipping in the cost, ask how much they’re willing to sell the doll for without that fancy outfit she has on. It doesn’t hurt to ask. But if you are putting in a lower offer for a doll, maybe sure that it is a) fair and b) something that you can afford. There’s no point in asking for a doll be discounted to $500 if you can only afford $350.

Layaway. Be smart about layaways, and work out some terms that both of you can deal with. Have everything in writing, and save those emails! Screenshot them, save them, file them away. If the seller says it’s a non-refundable deposit, ask about the subsequent payments, ask if it’s refundable within a certain time frame (e.g. is it refundable within 24-72 hours?). If you’re not familiar with the seller, ask if they’ve done layaways before and if they have any positive transactions that you could ask the other buyers questions about. Layaways are typically used for pricier dolls – don’t be afraid to ask questions and to protect yourself. Also, keep to a payment schedule that you can realistically follow, and communicate with the seller if something comes up! If you need an extension on a payment date, let them know early, and give them a realistic date that you will be able to make a payment.

Know when to walk away. Sometimes a deal seems too good to be true for a reason. Sometimes a buyer is just too much hassle to work with. Never be afraid to walk around from a transaction before money passes hands – you aren’t obligated to follow through. If something odd seems to come up, take it as a red flag. Be polite, don’t burn any bridges that you may need in the future, and let the seller know that you are no longer interested. You don’t need to give a reason for it, but you can if you want to. Knowing when to walk away also means being okay with letting that doll go – and also remembering that she (or he) wasn’t yours to begin with. A lot of people do become emotionally attached to dolls, and that’s okay, but remember that until that doll arrives in your hot little hands, she is still not yours. Be okay with that, and walk away.

If you missed The Deal of A Lifetime, remember that another doll will always come up. There will be other rare stock dolls, cute customs, and bait dolls for custom available. It is never the end of the world to miss a doll that’s gone up for sale. If it doesn’t work out this time around, there will be other dolls. Save the money you didn’t spend this time and wait for the next time that an opportunity comes a-knocking. And if it’s a custom doll, it doesn’t hurt to ask to be kept in mind in case the owner ever decides to put the doll up for sale again!

For all those savvy shoppers out there – share your shopping tip gems!

« Newer EntriesOlder Entries »
blythelife.com
blythelife.com